Large Patch Iron On designs are a fantastic way to revive old clothing, personalize accessories, or make a bold statement with your style. Whether you’re a seasoned crafter or a DIY beginner, ironing on a large patch can seem daunting. But fear not! With the right tools, techniques, and a dash of creativity, you can easily master the art of large patch application. This comprehensive guide will equip you with all the knowledge you need to confidently tackle your next project involving large iron-on patches.
Choosing the Right Large Patch Iron On
Before diving into the application process, it’s crucial to select the perfect large iron-on patch for your project. Consider these factors to ensure a successful outcome:
- Fabric Type: Different fabrics require different types of patches. Check the patch’s instructions to confirm compatibility with your chosen material. Cotton, denim, and canvas are generally suitable for iron-on patches.
- Design and Size: Opt for a design that resonates with your style and complements the garment or accessory you’re customizing. Consider the size of the patch in relation to your project to ensure a harmonious look.
- Quality and Durability: Look for patches made from high-quality materials and sturdy stitching. A durable patch will withstand washing and regular wear.
Gathering Your Supplies
Once you’ve found the perfect large patch, gather the following supplies:
- Ironing board or flat, heat-resistant surface
- Iron
- Thin cloth or pressing cloth
- Water spray bottle (optional)
Preparing the Fabric and Patch
Before you begin ironing, take these preparatory steps:
- Wash and iron the fabric: This removes any wrinkles or creases that might interfere with the patch’s adhesion.
- Position the patch: Place the large patch on the fabric exactly where you want it. Ensure it’s straight and centered.
Ironing on Your Large Patch: A Step-by-Step Guide
Now, let’s get to the exciting part – ironing! Follow these steps carefully for optimal results:
- Set the iron: Adjust your iron to the appropriate heat setting for your fabric. Refer to your iron’s manual for guidance. Using the highest heat setting is not always necessary and can damage delicate fabrics.
- Protect the fabric: Place a thin cloth or pressing cloth over the patch. This prevents direct heat from damaging the patch or fabric.
- Apply heat and pressure: Press the iron firmly and evenly on the cloth-covered patch. Hold it in place for the recommended time specified in the patch’s instructions.
- Check the edges: After ironing, carefully lift a corner of the patch to check if it’s securely adhered. If not, apply more heat and pressure.
- Let it cool completely: Allow the patch and fabric to cool down completely before moving or washing. This ensures the adhesive sets properly.
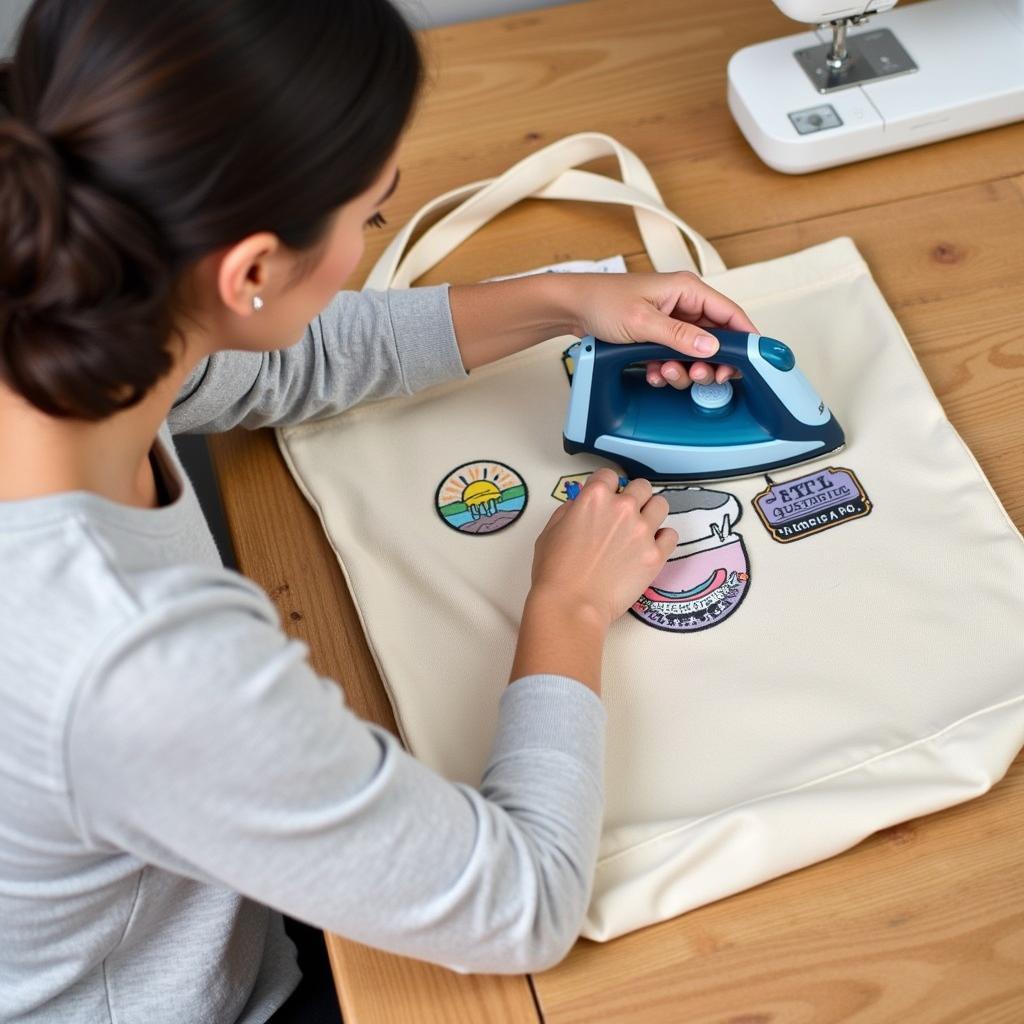 Ironing a large patch onto a tote bag
Tips for Long-Lasting Results
- Double-check the instructions: Different patches may have specific instructions. Always refer to the manufacturer’s guidelines for best results.
- Consider sewing: For added durability, especially for frequently washed items, consider sewing around the edges of the patch after ironing. This provides extra reinforcement.
- Avoid dry cleaning: Dry cleaning can sometimes loosen the adhesive on iron-on patches. Hand-washing or machine washing on a gentle cycle is generally safer.
Troubleshooting Common Issues
- Patch not sticking: This could be due to insufficient heat or pressure during application. Try ironing again for a longer duration, ensuring even pressure across the entire patch.
- Edges peeling: If the edges are peeling, cover them with a pressing cloth and apply heat again. Sewing around the edges can also prevent future peeling.
- Patch bubbling: Bubbling usually occurs when the iron is too hot or moved around too much during application. Lower the heat setting and use a pressing cloth to avoid this.
Frequently Asked Questions
Can I iron on a large patch to any fabric?
Not all fabrics are suitable for iron-on patches. Delicate fabrics like silk, velvet, or fabrics with a loose weave may not hold the patch well. Always check the patch’s instructions and test on a hidden area first.
How do I remove a large patch iron on?
Removing an iron-on patch can be tricky. You can try applying heat with an iron and gently lifting the patch. A seam ripper can help remove any remaining adhesive. However, complete removal without damaging the fabric is not always guaranteed.
Can I wash an item with a large iron-on patch?
Yes, you can generally wash items with iron-on patches. However, it’s best to turn the garment inside out and wash it on a gentle cycle with cold or lukewarm water. Avoid using harsh detergents or bleach.
Can I use fabric glue instead of ironing?
While fabric glue can be used, it may not provide the same level of durability and longevity as ironing. If you choose to use fabric glue, ensure it’s suitable for both the patch and the fabric, and follow the manufacturer’s instructions carefully.
Conclusion
Applying a large patch iron on might seem intimidating, but armed with the right knowledge and a dash of confidence, you can achieve fantastic results. By following these simple steps and paying attention to detail, you can personalize your belongings, breathe new life into old garments, and express your unique style.
If you need further assistance or have specific questions about your project, our dedicated customer support team is here to help. Contact us at 0902476650 or email us at [email protected]. You can also visit our office located at 139 Đ. Võ Văn Kiệt, Hoà Long, Bà Rịa, Bà Rịa – Vũng Tàu, Việt Nam. We’re available 24/7 to provide expert guidance and ensure your crafting adventures are a resounding success!