Fortress Battle Maps represent the pinnacle of strategic warfare in many games, demanding teamwork, coordination, and a deep understanding of the terrain. Whether you’re a seasoned commander or a fresh recruit, this comprehensive guide will equip you with the knowledge to conquer any fortress.
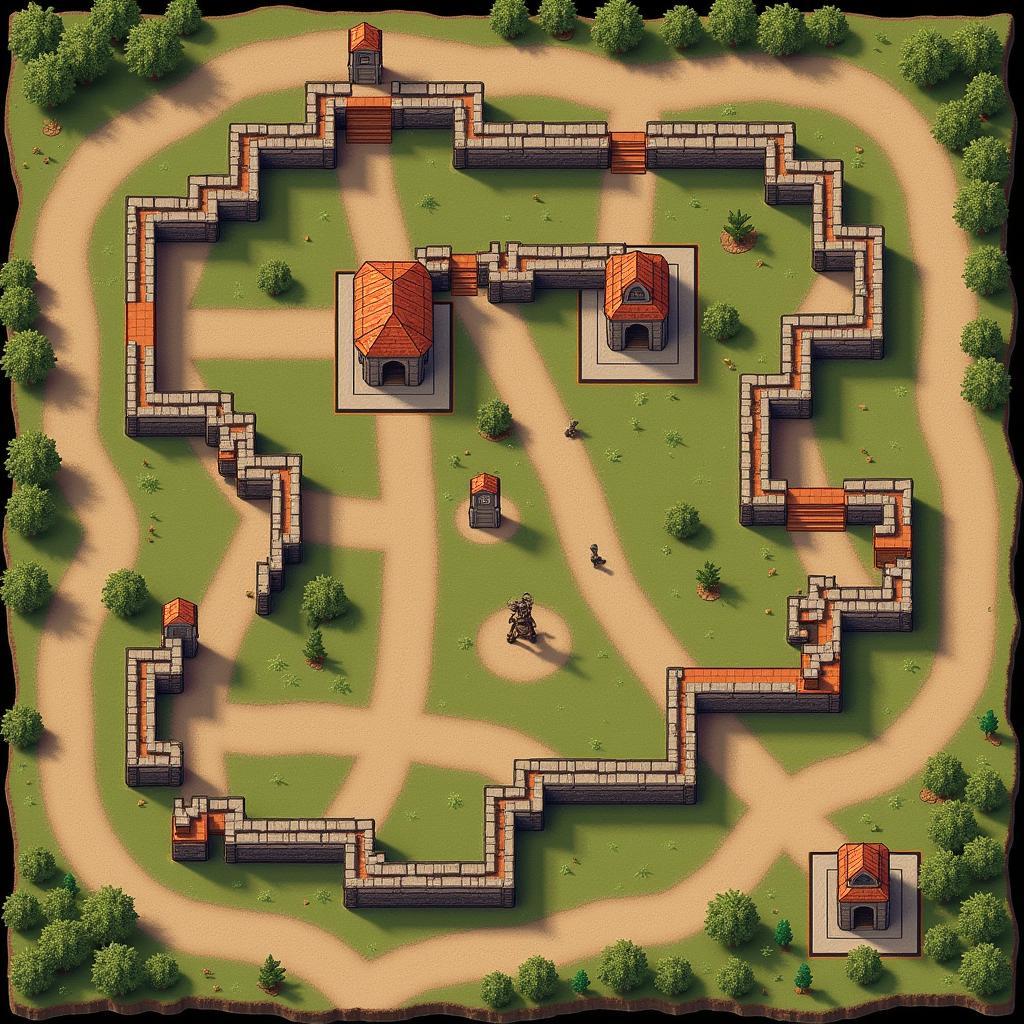 Example of a Fortress Battle Map Layout
Understanding the Battlefield: Key Elements of Fortress Maps
Fortress maps are designed with defense in mind, presenting a formidable challenge for attackers. To emerge victorious, you must familiarize yourself with the common elements:
- Walls & Gates: These are the first line of defense, offering protection but also acting as chokepoints. Breaching them often requires siege weapons or coordinated assaults.
- Towers & Bastions: Offering elevated firing positions, these structures provide defenders with a significant advantage. Taking them down early can cripple the enemy’s ranged capabilities.
- Courtyards & Open Spaces: While seemingly advantageous for attackers, these areas can become death traps if not approached strategically. Defenders can utilize traps, ambushes, or flanking maneuvers.
- Resource Points & Objectives: Controlling these points often provides tactical advantages like faster unit production or access to powerful reinforcements.
Offensive Strategies: Breaching the Fortress
Successfully assaulting a fortress requires meticulous planning and execution. Here are some proven strategies:
- Divide and Conquer: Split your forces into smaller, more agile units to attack multiple points simultaneously. This forces the defenders to spread thin, creating weaknesses to exploit.
- Siege Warfare: Utilize siege weapons like catapults, trebuchets, or cannons to break down walls, destroy defenses, and create openings for your troops.
- Flanking Maneuvers: Utilize stealth, diversions, or the element of surprise to bypass heavily defended areas and strike from unexpected angles.
- Combined Arms Approach: Coordinate different unit types – infantry, archers, cavalry – to maximize their strengths and minimize weaknesses. For instance, archers can provide cover fire while infantry advances.
Defensive Strategies: Holding the Line
Defending a fortress requires strategic thinking and resource management. Key considerations include:
- Strategic Positioning: Place ranged units in towers and on walls, utilize melee units to defend chokepoints, and position traps strategically.
- Reinforcements & Reserves: Don’t commit all your forces at once. Keep reserves to counter-attack, reinforce weak points, or react to unexpected enemy movements.
- Area Denial: Utilize traps, obstacles, and environmental hazards to slow down the enemy’s advance and funnel them into kill zones.
- Communication is Key: Maintain clear communication with your team to coordinate defense, call for reinforcements, and adapt to changing battle conditions.
Adaptability and Observation: The Keys to Victory
Fortress battles are dynamic and unpredictable.
- Observe Enemy Movements: Pay close attention to enemy troop movements, attack patterns, and resource allocation. This information can reveal their strategy and weaknesses.
- Adapt Your Strategy: Don’t be afraid to deviate from your initial plan. Flexibility and adaptability are crucial to react to unforeseen circumstances and exploit emerging opportunities.
Conclusion: Conquer the Battlefield With Knowledge
Mastering fortress battle maps is a journey that requires practice, observation, and a thirst for knowledge. By understanding the terrain, implementing effective strategies, and adapting to ever-changing circumstances, you can lead your forces to victory and etch your name in the annals of gaming legend.