A deflated football can really take the fun out of the game. But before you toss it aside, consider this: a simple Football Bladder Repair might be all you need to get back in the game. Whether it’s a slow leak or a sudden puncture, understanding the process can save you money and extend the life of your beloved ball.
Understanding Football Bladders: The Heart of the Game
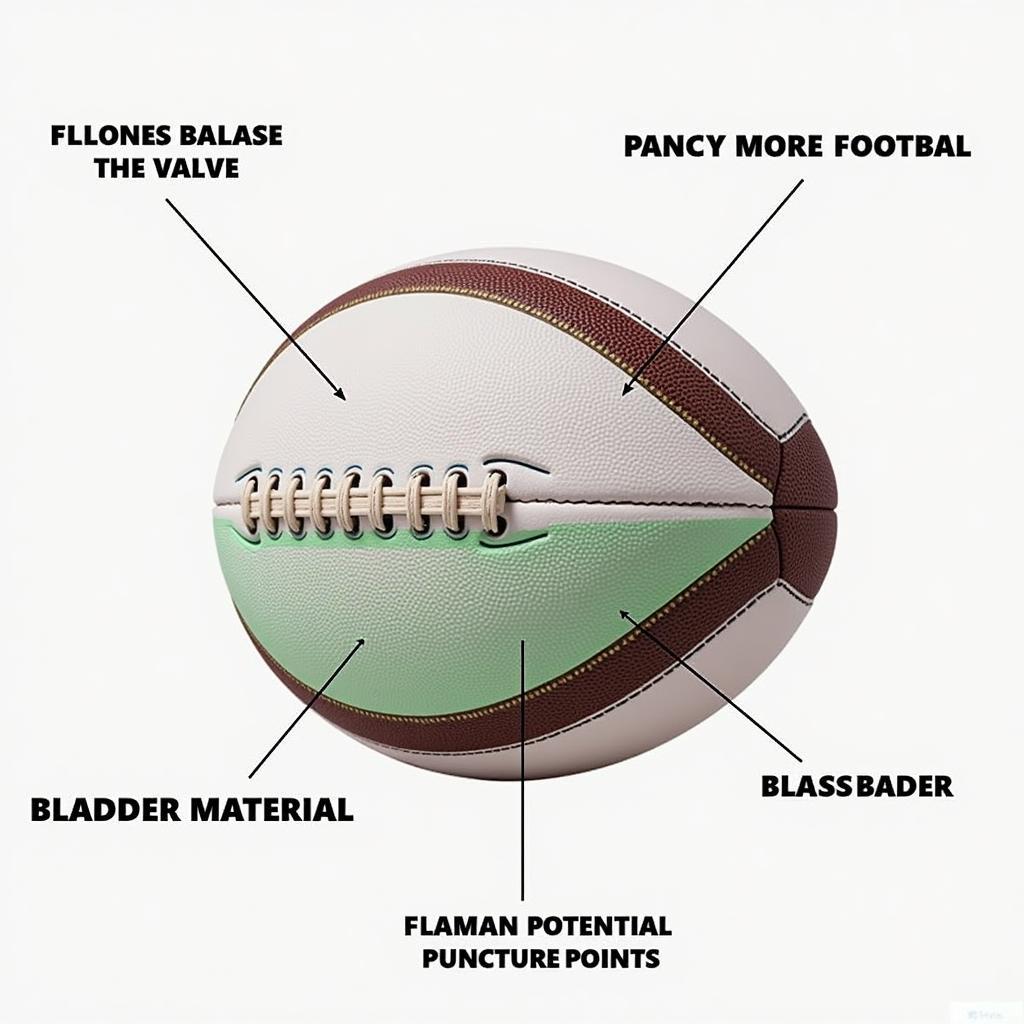 Anatomy of a Football Bladder
The bladder is the inflatable core of your football, holding the air that gives it shape and bounce. Typically made of rubber or latex, bladders are susceptible to wear and tear from overuse, improper inflation, and sharp objects. Knowing how to identify and address bladder issues is key to keeping your football game-ready.
Common Football Bladder Problems and Their Fixes
Recognizing the signs of a damaged bladder is the first step to a successful repair. Here are some common issues:
- Slow Leaks: Gradual deflation over hours or days indicates a small puncture or a problem with the valve.
- Sudden Punctures: A sharp object like a thorn or nail can cause a rapid loss of air, often accompanied by a hissing sound.
- Valve Issues: A leaky or damaged valve can prevent proper inflation and lead to deflation.
 Essential Tools for Football Bladder Repair
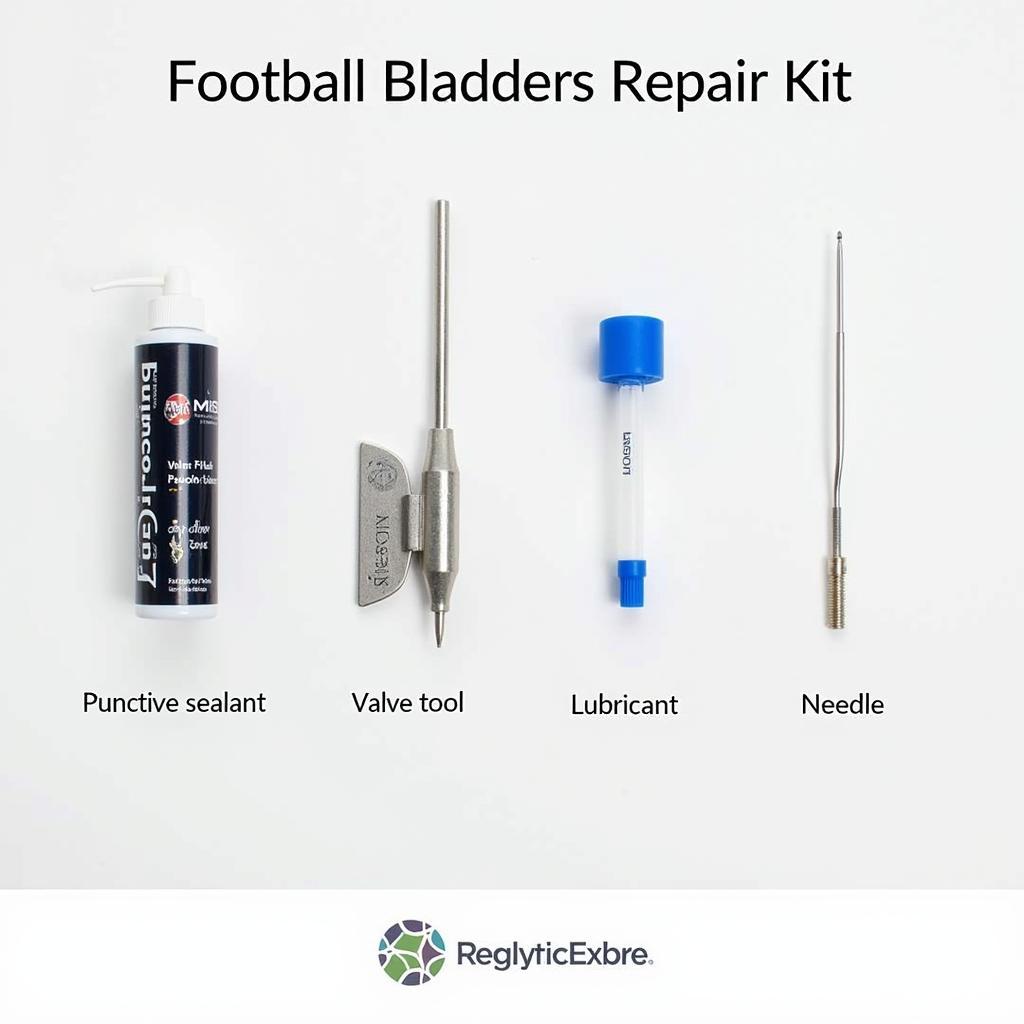
Once you’ve identified the problem, a football bladder repair kit can be your best friend. These kits typically include:
- Puncture sealant: A liquid latex solution that seals small holes and tears.
- Valve tool: Helps to tighten, remove, or replace a faulty valve.
- Lubricant: Eases the insertion of needles and the valve into the bladder.
- Needles: Various sizes for applying sealant or inflating the bladder.
How to Repair a Football Bladder: A Step-by-Step Guide
Fixing a football bladder is easier than you might think. Here’s a simple guide:
- Locate the Leak: Inflate the ball fully and submerge it in water. Look for escaping air bubbles to pinpoint the leak.
- Prepare the Area: Deflate the ball and dry the area around the puncture thoroughly.
- Apply Sealant: Using the needle applicator, insert a generous amount of sealant into the puncture.
- Inflate and Cure: Inflate the ball slightly and allow the sealant to cure for the recommended time (usually 24 hours).
- Test for Leaks: Once cured, re-inflate the ball and check for any remaining air leaks.
For valve issues, consult the manufacturer’s instructions or seek professional assistance for complex repairs.
Preventing Future Bladder Damage: Prolonging Your Football’s Life
 Tips for Storing Your Football Properly
Prevention is always better than cure! Here are some tips to prevent future bladder damage:
- Proper Inflation: Over-inflating stresses the bladder, while under-inflating can lead to punctures.
- Avoid Sharp Objects: Keep your football away from thorns, nails, and other sharp objects.
- Store Properly: Store your football deflated or partially deflated in a cool, dry place.
- Regular Inspection: Periodically check for signs of wear and tear, especially around the valve and seams.
Conclusion
A little care and attention can go a long way in keeping your football in top shape. By understanding common bladder problems and following the simple repair steps outlined above, you can ensure countless more hours of enjoyment on the field. Remember, a well-maintained football isn’t just about the game, it’s about preserving the spirit of competition and camaraderie that makes football so special.
FAQs
1. Can I use a bike tire repair kit on my football bladder?
While some components might be similar, it’s best to use a kit specifically designed for football bladders to ensure compatibility and effectiveness.
2. How long does a football bladder repair last?
The lifespan of a repair depends on the severity of the damage and the quality of the repair kit. With proper care, a well-executed repair can last for a significant amount of time, potentially extending the life of your football for an entire season or more.
3. Can I prevent all football bladder punctures?
While you can minimize risks, preventing all punctures is nearly impossible. However, following the preventative measures discussed will significantly reduce the likelihood of damage.
4. When should I consider replacing my football instead of repairing it?
If your football has multiple punctures, significant wear and tear, or if the bladder is damaged beyond repair, it’s probably time for a new one.
5. What should I do if I can’t find the leak in my football bladder?
If you’ve tried the submersion method and still can’t find the leak, it might be a very small puncture or a problem with the valve itself. In these cases, it’s best to consult with a professional or contact the football manufacturer for assistance.
Need further assistance with your football bladder repair? Don’t hesitate to reach out!
Contact us:
Phone: 0902476650
Email: [email protected]
Address: 139 Đ. Võ Văn Kiệt, Hoà Long, Bà Rịa, Bà Rịa – Vũng Tàu, Việt Nam.
We’re here to help 24/7 with a dedicated team ready to address all your gaming needs!